Lab 1C: Export, Upload, Import
Lab 1C - Export, Upload, Import
Directions: Follow along with the slides, completing the questions in blue on your computer, and answering the questions in red in your journal.
Whose data? Our data.
-
Throughout the previous labs, we've been using data that was already loaded in RStudio.
– But what if we want to analyze our own data?
-
This lab is all about learning how to load our own Participatory Sensing data into RStudio.
Export, upload, import
-
Before we can perform any analysis, we have to load data into
R. -
When we want to get our Participatory Sensing data into RStudio, we:
– Export the data from your class’s campaign page.
– Upload data to RStudio server
– Import the data into
R's working memory- Note: You can watch the following video for a step-by-step walk-through of the process:
Exporting
-
To begin, go to the IDS Tools page
– Click on the Campaign Manager.
– Fill in your username and password and click "Sign in".

If you forget your username or password, ask your teacher to remind you.
Campaign Manager

-
After logging in, your screen should look similar to this.
-
Click on the dropdown arrow for the campaign you are interested in downloading.
– At this point in the course, it will most likely be the Food Habits campaign.
Dropdown Arrow
-
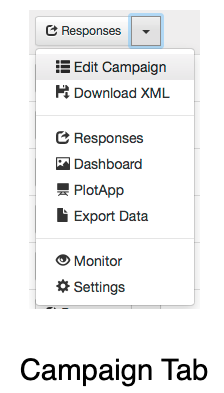
The options for the dropdown menu will look like this:
-
Click on the option labeled Export Data.
– Remember where you save your file!
Exporting
-
When you clicked the Export link, a .csv file was saved on your computer.
-
Now that the file is on your computer, we need to upload it into RStudio.
Uploading
-
Look at the four different panes in RStudio.
– Find the pane with a Files tab.
– Click it!

-
Click the button on the Files pane that says "Upload".
– Click on "Choose File" and find the SurveyResponses.csv file you saved to your computer.
– Hit the OK button.
-
Voila!
– If you look in the Files pane, you should be able to find your data!
Upload vs. Import
-
By Uploading your data into RStudio you've really only given yourself access to it.
– Don't believe me? Look at the Environment pane ... where's your data?
-
To actually use the data we need to Import it into your computer's memory.
-
To compute more quickly and efficiently,
Rwill only keep a few datasets stored in its memory at a time.– By importing data, you are telling
Rthat this is a dataset that is important to store in its memory so you can use it.
Importing

-
On the Files pane, find the data you want to import.
-
Click on the name of the file and choose the option "Import Dataset..."
-
If you do not see the data in your Environment pane, see the instructions on the next slide.
Importing with Google Drive
-
If you see the data in your Environment pane, skip this slide.
-
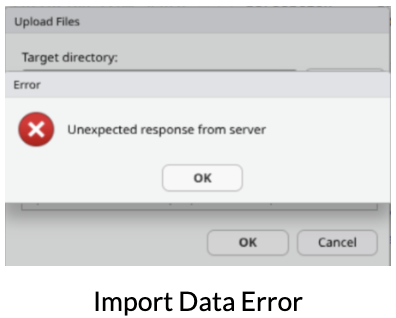
If you do not see the data in your Environment pane and you got the following error message, follow the steps below for an alternate method of importing your data.
-
Your teacher will provide you with an ID to store in an RScript and run.
Example:
id <- "1hMVVxWhSv31jCNuKILRhNRTdUknNIOyb" -
Use the read.csv command below to read in the file.
Example:
new_file_name <- read.csv(sprintf("https://docs.google.com/uc?id=%s&export=download", id), stringsAsFactors=T) -
You should now see your file in your Environment!
-
If you'd like to save the data file to your "Files" in your project, run the following code:
write_csv(new_file_name, "new_file_name.csv")
Data Preview

- You can give your data a name using the Name: field in the lower left corner.
What's in a name?
-
The name you give your data is what you will use when you write code to analyze your data.
– Good names are short and descriptive.
– For your Food Habits campaign, some good names to use would be "foodhabits" or even just "food".
-
When you're ready, click the Import button.
-
Make sure the name under Import Options matches the name in the Code Preview before you click Import.


read.csv()
-
After you click Import you might notice something appeared in your console.
data.file <- read_csv("~/SurveyResponse.csv") View(data.file) -
This is the actual code
RStudiouses to read your data when you clicked the Import button.– So instead of using the
RStudiobuttons, we can actually Import by writing code similar to what was output into the console!– This will come in handy later in the course.
A word on staying organized...
-
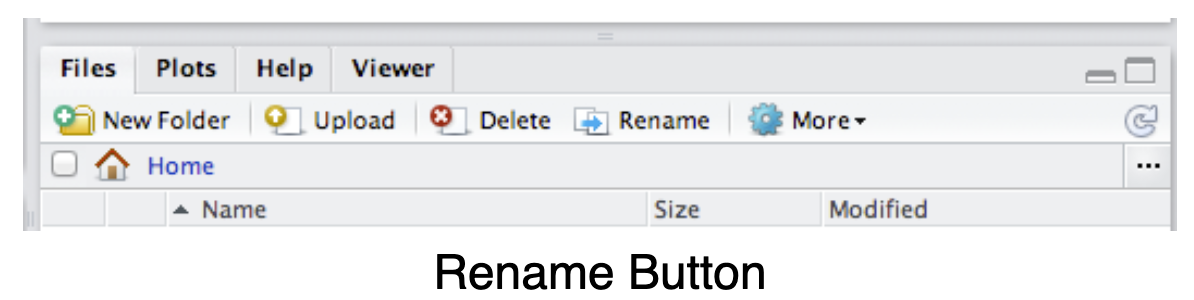
The Files tab has a few other features to help keep you organized.
– CampaignName - Ids Teacher Year Semester probably isn't the best name for your data. Click Rename to give it a clearer name.
– Often, it’s helpful to give your data file the same name as when you import your data.
– So in this case, we could name our data file food.csv.
Analysis Time
-
After you Export, Upload, Import your data, you're ready to analyze.
-
(1)
Viewyour data and select a variable. Write and run code to create an appropriate plot for that variable. -
(2) What variable did you choose? What does the plot tell us about that variable?
-
Summarize the process:
– (3) What might your future self forget about this process? Summarize the steps you took in this lab to use new data in RStudio.